
Safe Hot-Swapping of RX3i Analog I/O Modules: Procedures and Damage Prevention Checklist
Introduction
As an operations manager with 15 years in industrial controls, I’ve seen firsthand the good, the bad, and the ugly of plant maintenance. When it comes to hot-swapping modules, especially sensitive analog I/O, many technicians rush. This can lead to costly damage and downtime. This guide will help you perform these tasks safely, ensuring your GE RX3i systems run smoothly.
Why Hot-Swapping Needs Care
Hot-swapping is convenient. It lets you replace a faulty module without shutting down the entire system. But convenience can breed carelessness. Analog I/O modules are particularly vulnerable. They deal with precise, low-level signals. A small surge or incorrect procedure can fry them, causing significant financial loss and operational delays. My experience with brands like Bentley Nevada, GE, and AB has taught me that prevention is always cheaper than repair.

Essential Procedures for Safe Hot-Swapping
Before you even think about pulling a module, follow these steps:
Preparation is Key
- Identify the Module: Double-check the module number and slot. Sounds simple, but mistakes happen. Verify the replacement module is the exact match.
- Understand the Circuit: Know what the analog inputs or outputs are connected to. Are they controlling a critical valve? Monitoring a vital sensor? This context helps you understand potential impacts if something goes wrong.
- Isolate the Signal (If Possible): If your system allows, temporarily disable or isolate the signals going to or from the module. This is ideal but not always feasible.
- Gather Your Tools: Have a non-conductive tool for pressing ejector tabs and a static-dissipative wrist strap ready. ESD (Electrostatic Discharge) is an invisible killer of electronics.
The Swapping Process
- Wear ESD Protection: Always wear your static-dissipative wrist strap. Ground yourself properly. This is non-negotiable.
- Locate and Loosen: Gently loosen the captive screws on the existing module.
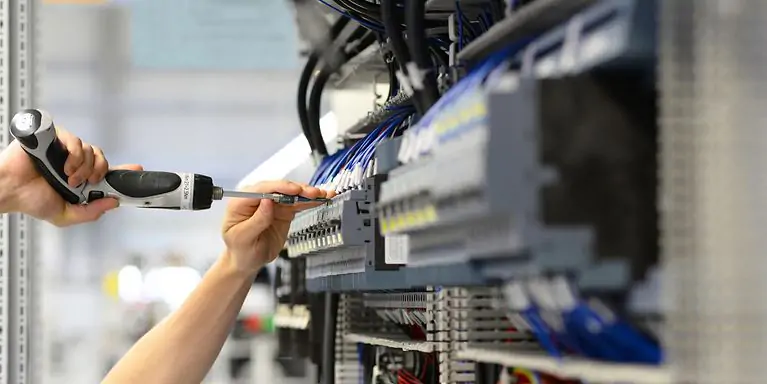
- Eject Carefully: Use a non-conductive tool to press the ejector tabs. Slowly and steadily pull the module straight out from the rack. Avoid wiggling or forcing it.
- Insert the New Module: Align the new module carefully with the slot guides. Push it in firmly and evenly until it clicks into place. Ensure the ejector tabs are fully seated.
- Secure the Module: Tighten the captive screws. This ensures a good connection and prevents vibration issues.
- Verify Operation: Observe the module’s status LEDs. Check your HMI or SCADA system for any alarms or unusual readings. Confirm the analog signals are stable and accurate.
Damage Prevention Checklist
This checklist is based on years of troubleshooting industrial systems. Don’t skip any step.
- Is the replacement module the correct part number? (Yes/No)
- Are you wearing ESD protection and properly grounded? (Yes/No)
- Have you identified and, if possible, isolated the connected signals? (Yes/No)
- Did you use a non-conductive tool for ejection/insertion? (Yes/No)
- Was the module inserted straight and fully seated? (Yes/No)
- Are the captive screws tightened? (Yes/No)
- Are all status indicators on the module normal? (Yes/No)
- Is the system (HMI/SCADA) showing normal operation with no alarms? (Yes/No)
My Unique Perspective: Beyond the Manual
Most manuals tell you what to do. But they often miss the why. My unique take is this: Think of each hot-swap as a mini-surgery. Precision, patience, and sterile (ESD-free) conditions are paramount. Rushing often leads to expensive mistakes. I’ve seen modules damaged not by incorrect insertion, but by static discharge during handling, or by technicians forcing a misaligned module. Slow down. Double-check. Your plant’s uptime depends on it.
Conclusion
Safe hot-swapping of RX3i analog I/O modules is not just about following steps; it’s about adopting a mindset of meticulousness and foresight. By adhering to these procedures and diligently using the damage prevention checklist, you can significantly reduce the risk of module failure, prolong the life of your equipment, and ensure your operations run without a hitch.
Looking for reliable GE RX3i modules or other industrial automation components?
Click here to explore PLCDCS HUB Limited‘s product range and enhance your system’s reliability today!
| Model | Title | Link |
|---|---|---|
| IC695ALG112 | GE Fanuc Isolated Analog Module | Learn More |
| IC695ALG106 | Analog Input Module GE Fanuc | Learn More |
| IC695ALG628 | GE Fanuc RX3i Analog Input Module HART | Learn More |
| IC695ALG626 | GE Fanuc PACSystems RX3i Analog Input Module | Learn More |
| IC695ALG508 | GE Fanuc RTD Input Module PACSystems RX3i | Learn More |
Related Posts


One Comment
Comments are closed.
Jason Miller
June 25, 2025 at 9:28 am
After a faulty RX3i analog module halted our frozen pizza line, GE’s hot-swap checklist was a lifesaver. We isolated the channel, grounded ourselves, and used the extraction tool – no cascading failures! Previously, rushed swaps fried adjacent modules, costing $8k in replacements + 12hr downtime. Now, our maintenance team keeps printed checklists at every PLC rack. For food/beverage plants where minute-long stoppages waste product, this procedure is non-negotiable. Your guide reinforced our training – sharing it with our technicians tomorrow.